MailChimp is a wonderful online tool that can be used to send out mass emails such as newsletters, special notices, etc. MailChimp offers an easy way to keep up to date email lists by having forms that readers can fill out and subscribe to. They offer a variety of templates that you can customize to create professional looking emails easily. You also have the ability to read reports on your mass emails to see who is actually opening your emails. The best part of the program is that it is free!
Sign Up.
Visit mailchimp.com and click on “Sign Up Free”.
*Make sure you are using a browser such as Internet Explorer or Firefox. I found that some of the features don’t work in Safari.
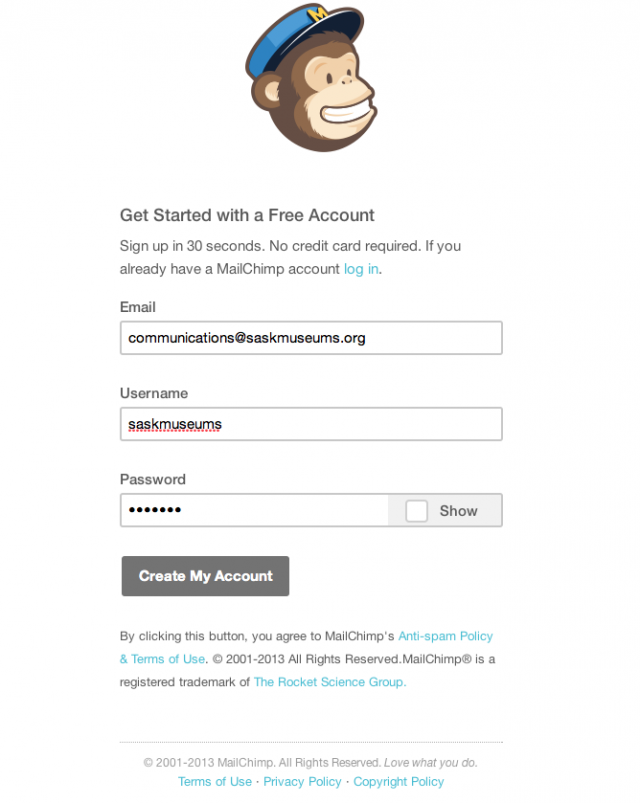
Get started by filling out your email, a username and a password and click “Create My Account”.
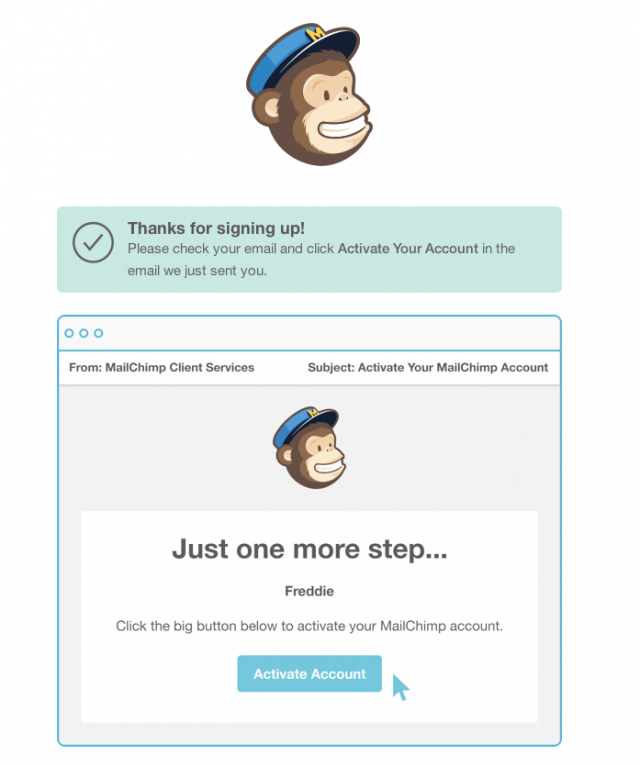
MailChimp will send you an email verifying your sign up. Check your email and click the Activate Account button.
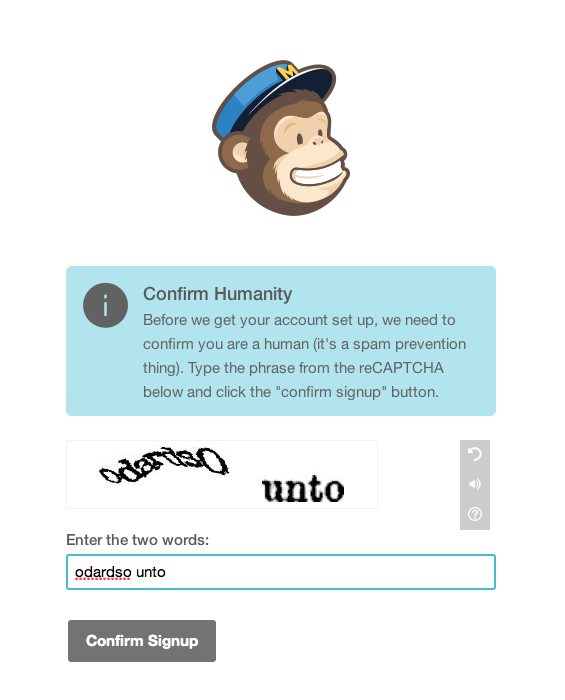
Fill out the reCAPTCHA form at the bottom. A reCAPTCHA is simply a form that requires you to type in words that match the phrases provided. This lets MailChimp know that you are a person signing up and you aren’t spam. Click “Confirm Signup”.
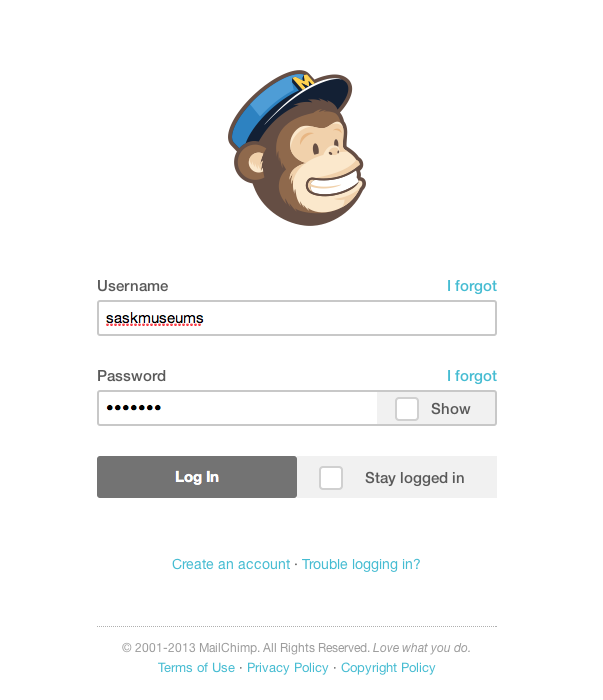
MailChimp will re-direct you the sign in page. Here you can type in your username and password for the first time.
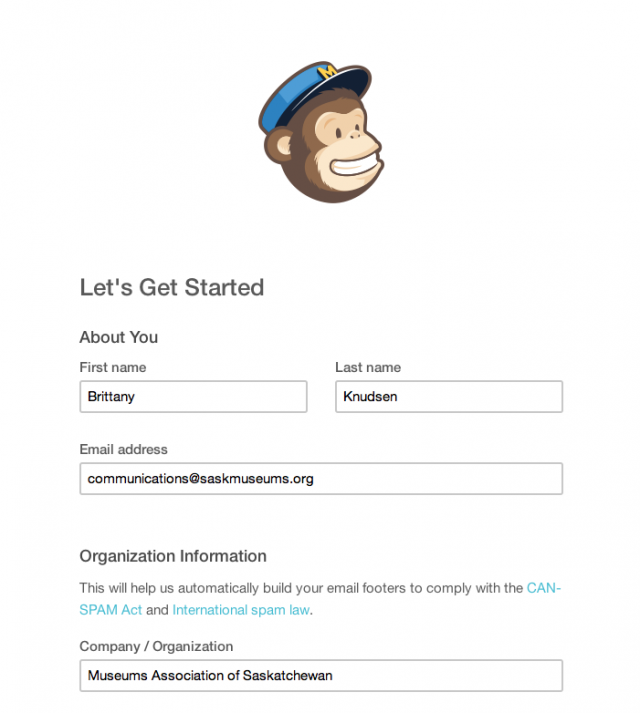
Let’s get started.
MailChimp will have you fill out a list of information about you to setup your account.
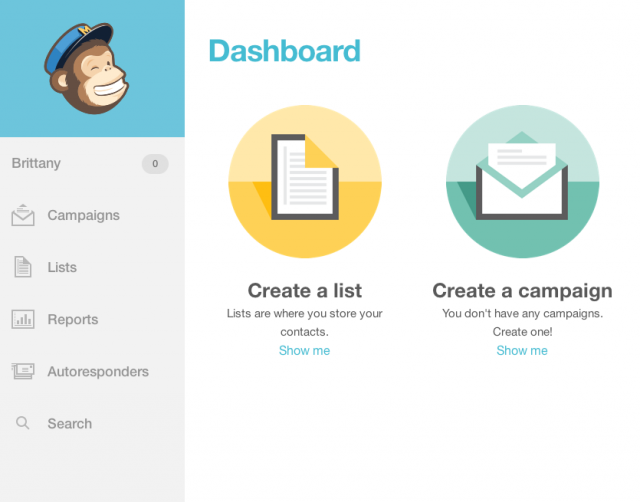
Once you are finished MailChimp will direct you to the Dashboard. The Dashboard is your home base.
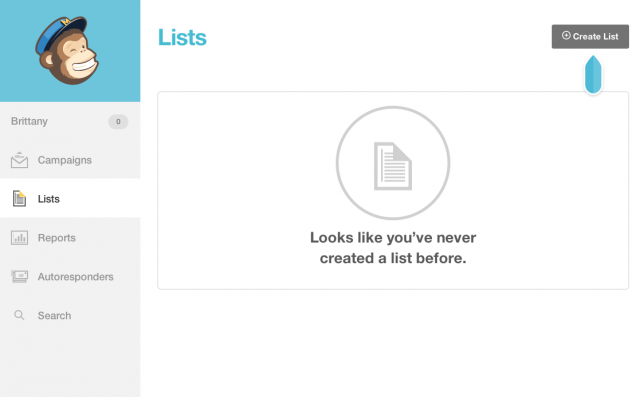
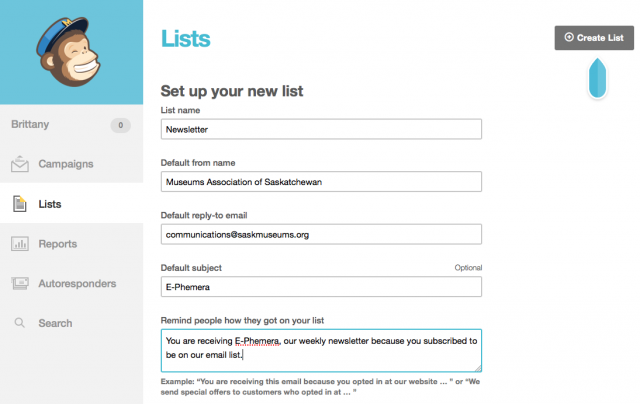
Create a list of recipients.
To create a list, click on the list tab from the menu on the left. Then click on the “Create List” button in the top right hand corner.
Again, fill out the setup form of what you want your list to be.
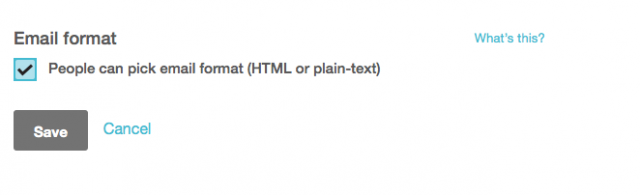
As you scroll down you will see other options. One of those options is Email format. I would strongly suggest clicking the checkbox for this one. This will allow subscribers to pick which email format they prefer to receive. HTML is standard for most people but for those with slow connections or dial-up, the plain-text option is necessary.
When you are finished click save.
Get subscribers on your list.
You have 2 options: Import subscribers from an existing list or use a signup form to get subscribers.
With this one I would definitely suggest using a signup form. I say this because if you import a list of contacts (especially a large list), there could be incorrect emails, full mail boxes or no longer existing emails in the list. When an email is sent to these emails in MailChimp it is sent back as a bounce backs. Too many bounce backs and MailChimp will think you are sending spam and will lock you out of your account. Using a signup form ensures the email addresses are correct and only interested readers are reading your emails.
When we build sign up forms we use the “Link to a form” button . This enables us to pop the link into our existing emails and on our website easily.
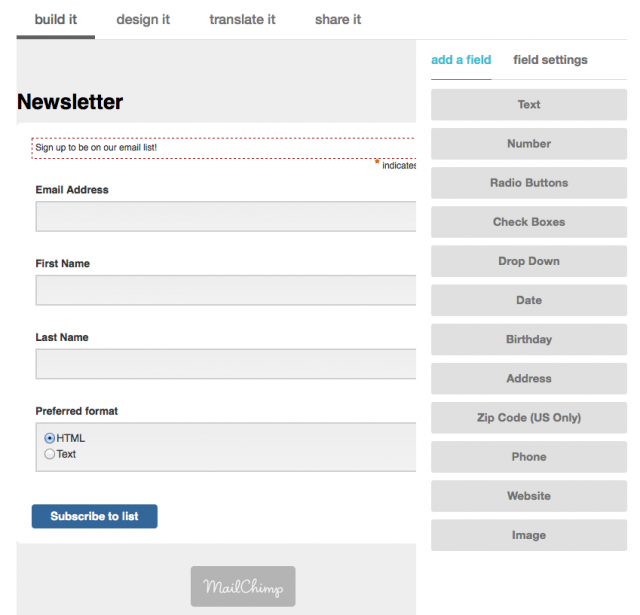
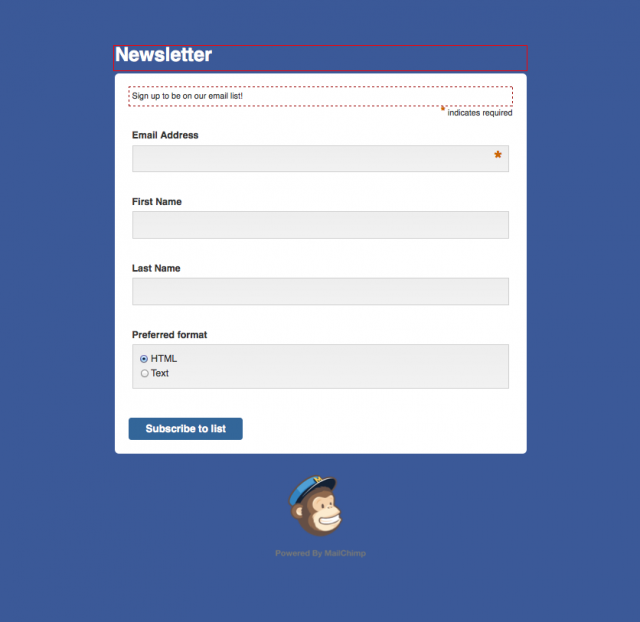
The next step is to build your form. MailChimp sets it up for you and the default form worked for us. Just add a little note in the top form to tell your subscribers what they are signing up for. If you like you can add additional fields such as date, birthday, address, etc. from the right hand column. Generally less is more, so email, name and type of format is simple enough.
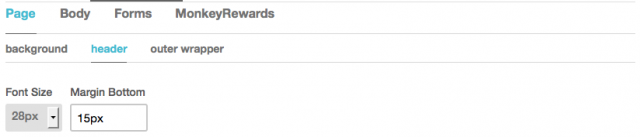
Your next step in creating your form is to select the “design it” tab. This gives you the option of styling your form to the way you want it. Consider matching it to your website colours or logo colours. Click on the tabs to style each different part of the form.
Here’s a quick example of how ours could look:
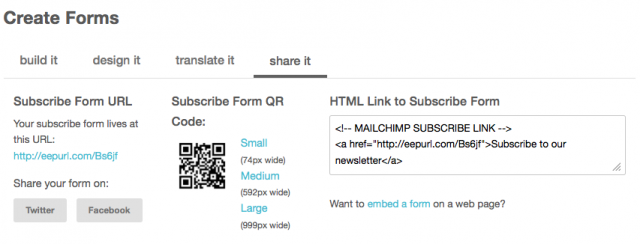
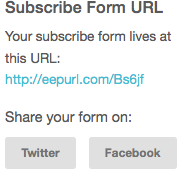
The final step in creating your form is to share it. Click on the “share it” tab and MailChimp will give you a variety of options.
Copy and paste the link it provides you with and insert it in your emails or your website. You can also share your form on Twitter or Facebook.
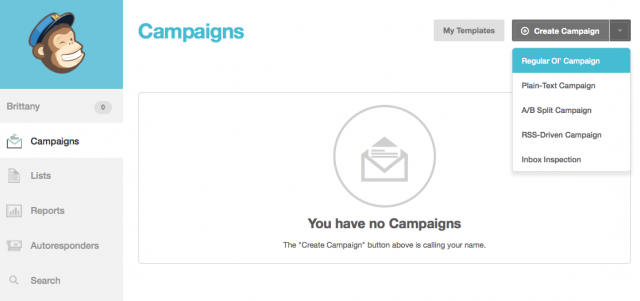
Create an email campaign
An campaign is really just a fancy name for a mass email. A campaign allows you to create a mass email that includes images (html format) and another email that is text based. It also stores other important information from you such as a list of who you are sending the email to, the subject of the email and who sent the email. This will make more sense as you go through and create your first campaign.
To get one started just click the Campaigns tab on the left and click on the “Create Campaign” button. The drop down menu will give you a variety of options but we always use “Regular Ol’ Campaign”. This means you will be able to design an email that works for html and plain text so no one will be left out.
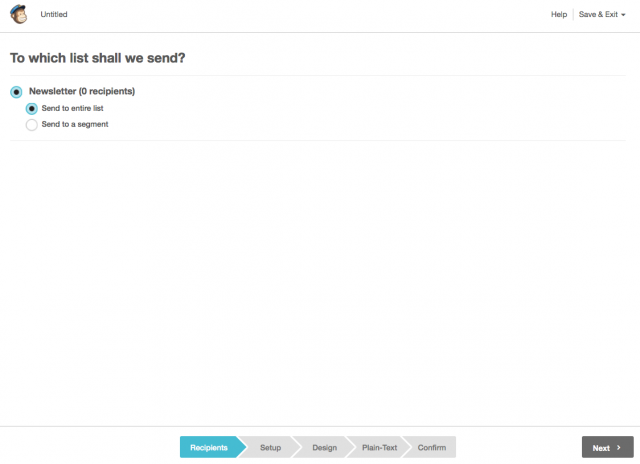
Choose the list this email will be sent to. Click Next.
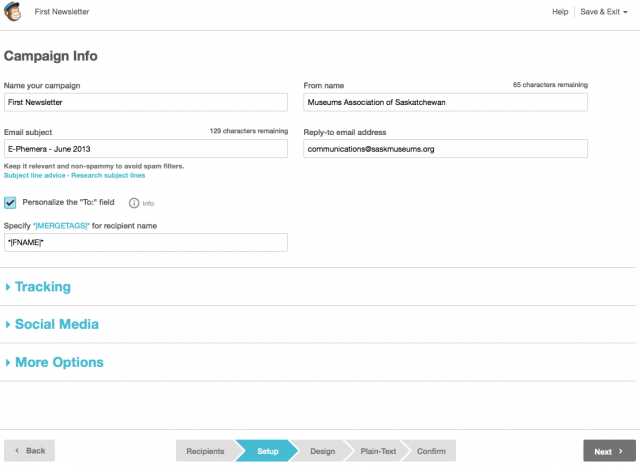
Then fill out information about your campaign. Click Next.
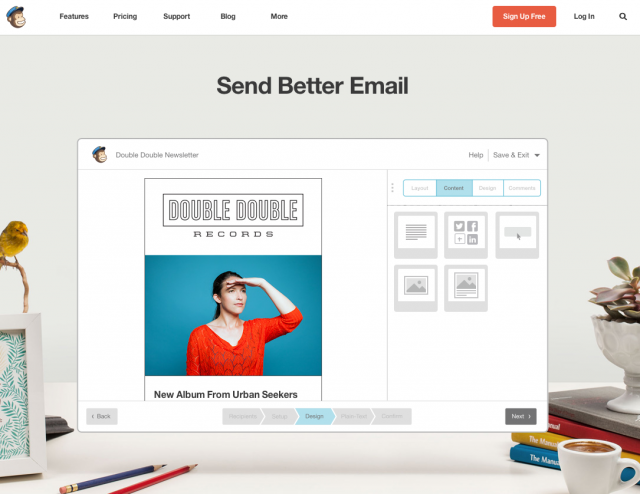
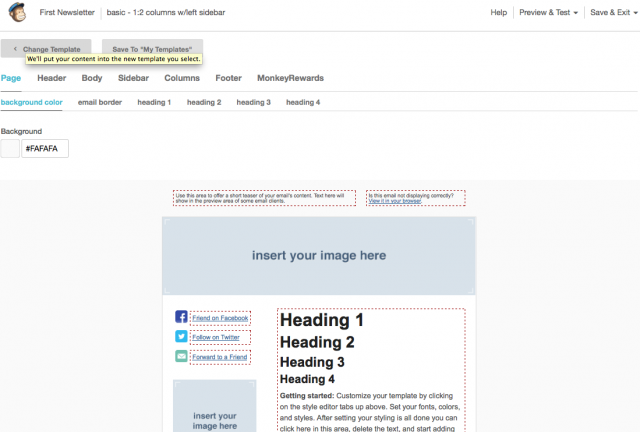
Now the fun part! Choose a template for your email. Click through the tabs, just like you did when you created your form, to style and change certain looks of the email. Mail Chimp makes it easy to insert in images and type in text in boxes just like you are writing a letter.
When you are satisfied click Next. This step requires you to create a Plain-Text Message. Do not skip this step! This is the email your subscribers will see if they chose “plain-text” as the format. I always click on the button “Copy Text From HTML Format”. This saves time but it is necessary to go back through the email and double to check to make sure everything was copied over correctly. MailChimp copies over everything, such as picture names and links. Almost every time there are a few items I have to manually go in and delete.
When you are happy with it click next.
Check the details and click “Confirm”.
Your email has now been sent!
Keep in mind that at anytime your can save your campaign and go back to it for further editing.
I hope this tutorial has given you a little taste at how you can set up an account with MailChimp. It has helped us at MAS be a little more organized with our email lists, helped us create more creative looking emails and gave us insight on who reads our emails and what works best for our members.
If you have any questions about MailChimp please contact Brittany at (306) 780-9451, [email protected].
June 19, 2026 WESTERN DEVELOPMENT MUSEUM – NORTH BATTLEFORD is now accepting applications for the following position: Grounds Assistant (term) GENERAL DESCRIPTION: Reporting to the Facility & Maintenance Supervisor, the
June 19, 2026 WESTERN DEVELOPMENT MUSEUM – NORTH BATTLEFORD is now accepting applications for the following position Customer Service Assistant (term) GENERAL DESCRIPTION: Reporting to the Manager, the Customer Service
Are you a summer student planning to work at a museum? Let MAS help you hit the ground running! Learning opportunities and resources will be made available for museums and