MAS is in the midst of a major web upgrade, and we have put the call out to our members for updated photos of their museums to go in our new Museums Database. The database acts as a guide for those seeking out museums across the province, and showcases all of our member museums.We understand that our some of our members will have better photography skills than others, so I have put together a few easy tips to make sure that members take great photos that will make their museums stand out on the web.
The Rule of Thirds
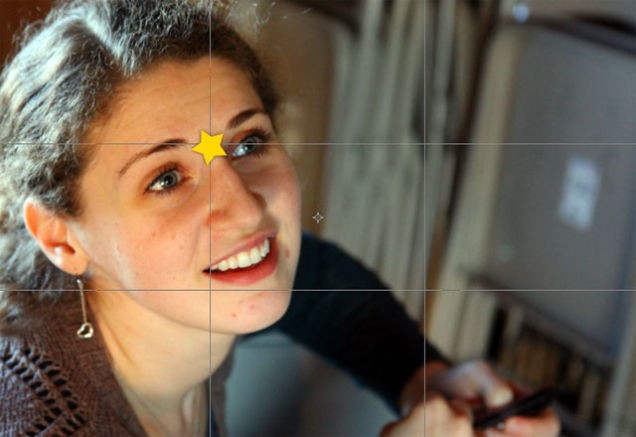
This is the most common technique for taking eye-catching photographs and its one of the first things they teach you in photography class. The basic principle is that your photo is divided into three equal horizontal and three equal vertical sections, creating a grid with nine boxes and four points of intersection. Those four points of intersection are the areas in a photo that the eye is naturally drawn to and its where you want to try and place your photo subject. In this photo, you will see there is a point of intersection that brings your eye right to the woman’s face. Placing her in, say the middle of the frame would make the background more of a distraction and cause your eye to drift away from the subject. It’s a bit of a tricky concept at first, but paying attention to how you frame your photos by using this rule goes a long way towards improving your photos.
The focal point of the photo, the woman’s face, obeys the rule of thirds as it aligns with a point of intersection on the photo’s “grid.”
Time of Day
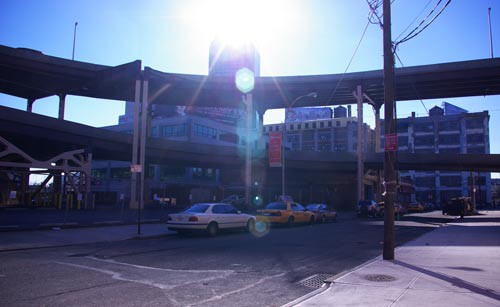
Pay attention to the amount of lighting that is available. Taking a photo of your museum at noon on a sunny day, for example, will result in dark shadows, as the sun is at its highest point in the sky with no direct lighting coming from the side. It is best to take photos early in the morning or later in the afternoon when the sun is lower in the sky and will not cast as many shadows.
Taking photos at noon when the sun is at its highest point will cast large shadows on buildings and create spots on the photo from the bright sun.
Check your settings
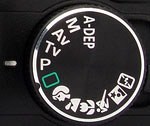
Digital cameras these days come pre loaded with all sorts of settings that can seem baffling or intimidating to those who simply want to take a photo. Most cameras have a click wheel at the top with various settings. Your best bet is to keep it on “A” for auto, or use the “landscape” setting. If your camera has any other settings for outdoor photography, try those out as well.
Digital cameras have a click wheel with all sorts of setting options. To take the best photo of your museum, use the “A” (automatic) setting, or the “Landscape” setting (usually an image of mountains, as seen in this photo. If you are a more adventurous photographer, use the “M” setting, and set everything yourself.
Get Close
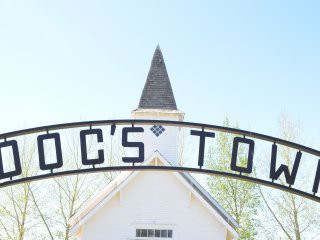
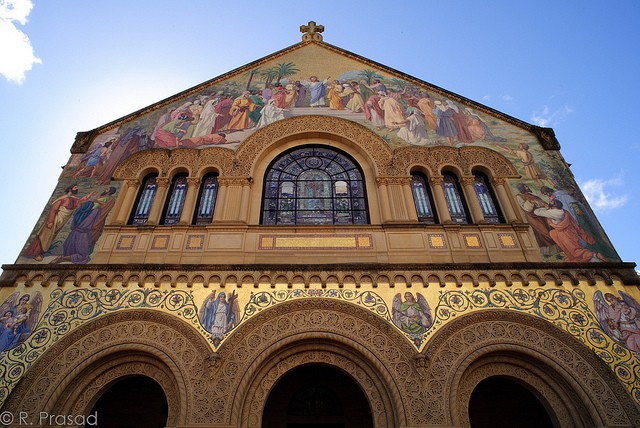
The best pictures are taken from close up. If you are trying to take a photo of your museum, be sure that you are standing as close to the building as possible. The whole property does not need to be in the photo. If your museum, like many, has multiple buildings, take a photo of the main building and include photos of some of the other buildings as well.
Taking a photo of a building from up close can make for a more captivating and interesting image.
Be Creative
Don’t just take a straight-on shot of your building. Try taking photos at different angles, in different lighting, or from different perspectives. Fool around with your camera’s settings. Take as many photos as you want until you get the perfect shot. The best part about digital photography is that you have the storage space for hundreds of photos!
Happy photographing! If you need any tips or pointers on photographing your museum, don’t hesitate to drop me an email at [email protected]
June 19, 2026 WESTERN DEVELOPMENT MUSEUM – NORTH BATTLEFORD is now accepting applications for the following position: Grounds Assistant (term) GENERAL DESCRIPTION: Reporting to the Facility & Maintenance Supervisor, the
June 19, 2026 WESTERN DEVELOPMENT MUSEUM – NORTH BATTLEFORD is now accepting applications for the following position Customer Service Assistant (term) GENERAL DESCRIPTION: Reporting to the Manager, the Customer Service
Are you a summer student planning to work at a museum? Let MAS help you hit the ground running! Learning opportunities and resources will be made available for museums and