Assistant Curator – Wanuskewin Heritage Park
Are you an emerging Indigenous museum professional ready to help share stories that have lived on this land since time immemorial? Wanuskewin Heritage Park invites you to step into a
Technology, social media in particular, can seem overwhelming if you’re not familiar with it. However, there are simple things you can do to get more comfortable with social media. Creating your own Facebook page for your museum is a good way to start!
You’re probably thinking, “Why does my museum need a Facebook page at all?” Here are just a few of the many benefits:
Let’s get started!
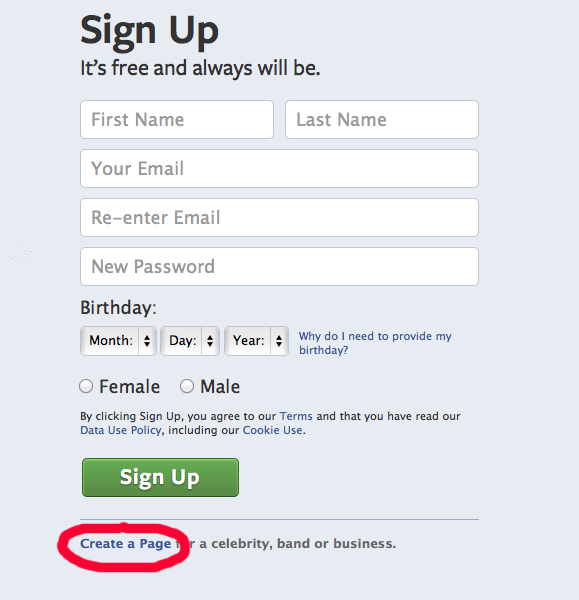
Step 1 – Go to www.facebook.com. Log out of your account if you are logged in and you should see the intro page. Click the blue link at the bottom that says “Create a Page”.
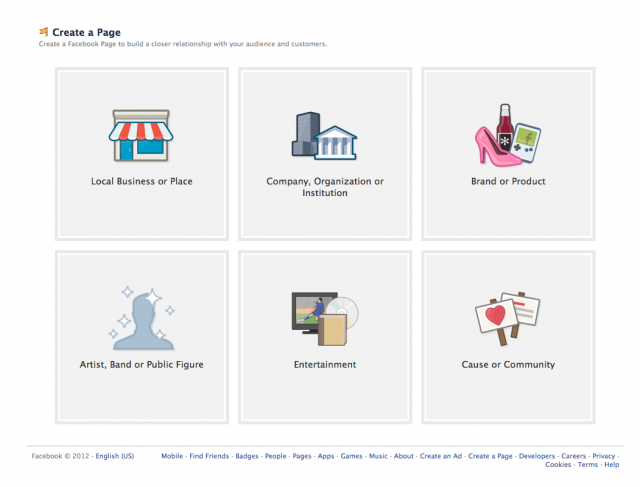
Step 2 – Choose a business type that best suits your museum or gallery. Most of you will choose one of the first two listed: “Local Business or Place” or “Company, Organization or Institution”.
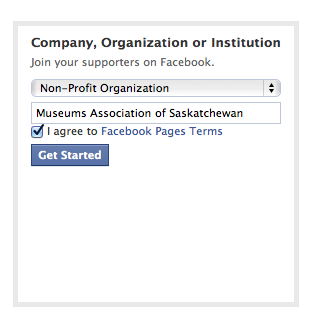
Complete the fields that show up, which will differ depending on which option you select. Click the “Get Started” button once you’ve completed the form.
For the MAS page, we chose Company, Organization or Institution:
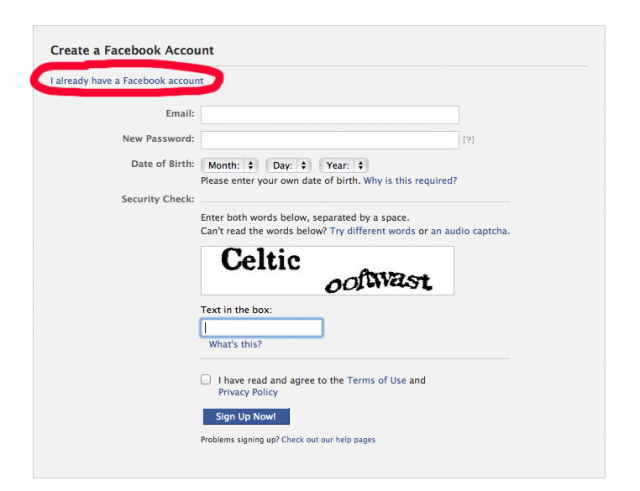
Step 3 – Create a Facebook Account. *If you already have a Facebook account click on the “I already have a Facebook account” link and enter your login information.* If you don’t have an account fill out the form and click “Sign Up Now!”
Step 4 – Set up your page. (3 steps)
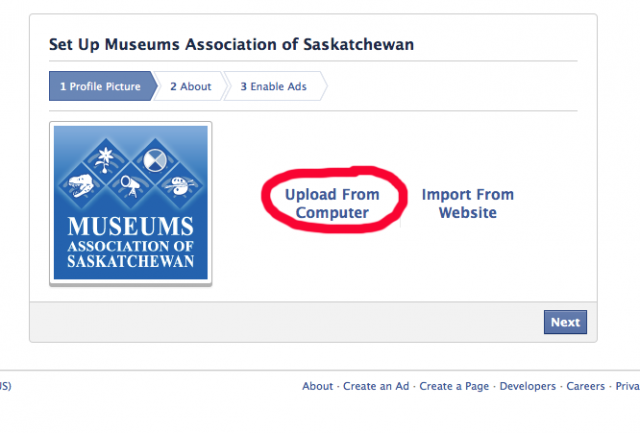
1. Profile Picture – Upload your museum’s profile picture. Usually this is your museum’s logo or name. Choose “Upload From Computer” to find the file on your computer. Keep in mind the image should be at least 180×180 pixels. When you are satisfied with your picture click “Next”.
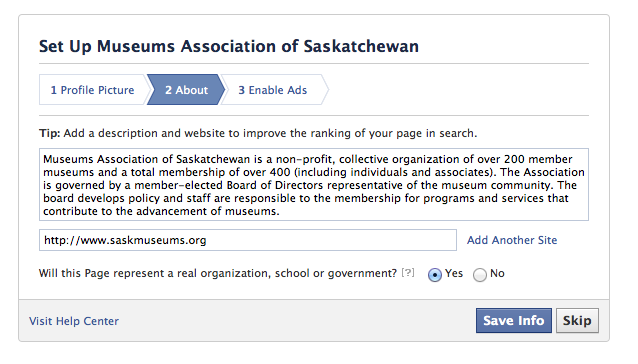
2. About – Fill out the form to provide information about your museum or gallery. Write a short description and provide your website if you have one. *You can add more to this later, Facebook is just getting your page set up here. Choose “Save Info” once you have provided your museum’s information.
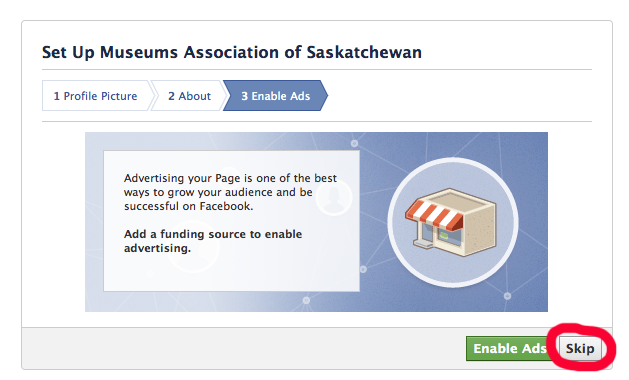
3. Enable Ads – Advertising can help to increase likes and views of your page… but there is a cost to these ads. For most of you the option here would be to choose the “Skip” button.
That’s it! – You’ve created your Facebook page!
Step 5 – Add a cover photo
One I final thing that every Facebook page should have is a cover photo. The cover photo is a larger photo that displays at the top of your page above your profile picture. Again, keep in mind that the dimensions of a cover photo are 851×315 pixels. If your image is smaller or larger it will be stretched or cropped to fit.
To add a cover photo to your page click “Add a Cover” in the right hand corner.
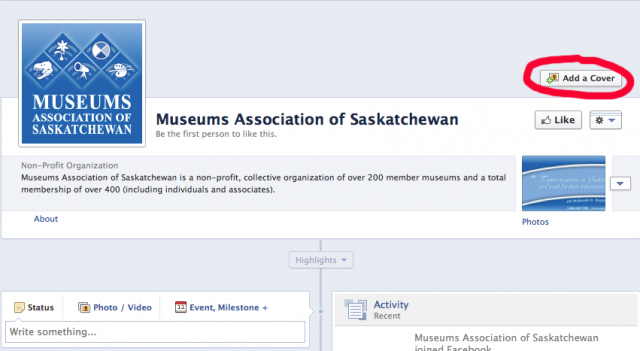
Choose from the drop down whether you want to “Upload a Photo” (Most of you will choose this option if you haven’t yet added any photos) or “Choose from Photos”.
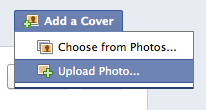
Once you choose a photo, you can reposition it by clicking on the image and dragging it up or down. Click “Save”.
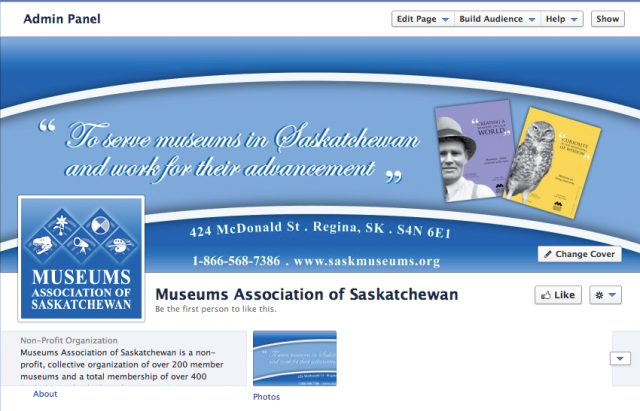
Congratulations, you have added a cover photo! Making your Facebook page look more unique and professional to your audience! Here’s what our MAS Facebook page looks like at this point:
Stay tuned for more blog posts in the Social Media Series. What did you think of the first blog post in the series? Tell us in the comments below and don’t forget to tell us what you would like to learn about next!
Are you an emerging Indigenous museum professional ready to help share stories that have lived on this land since time immemorial? Wanuskewin Heritage Park invites you to step into a

Usual office hours will resume on January 5th, 2026

Just a reminder that the Final Report for the Museum Improvement Micro Grant for Community Museums is due December 5th! Your final report will require you to provide a brief