Now that you have your Facebook Page set up and running it is important to know how to manage the information that is on your page.
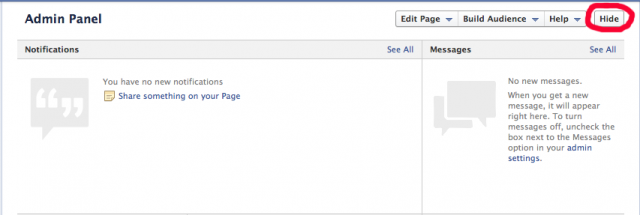
Admin Panel – The Admin Panel is a tool that only you, the administrator of the page can see. It is located at the very top of your page and can be hidden or shown by toggling the button at the top, right hand corner of the panel. There are a variety of things you can do using the Admin Panel but for now it’s only important that you know where to find it and the fact that you are the only one who can see it. Its uses will be explained more as the tutorials get more detailed.
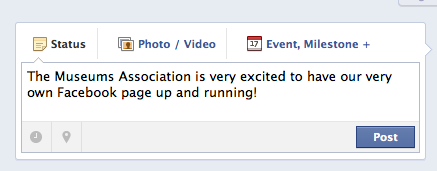
Status – To get started, try updating your status on your page. Under your profile picture in the top left hand corner you will see a place where you can type a Status, Photo/Video, or Event Milestone. To start with begin typing a test status in the box provided and click “Post”.
Highlight – To make your post wider and more prominent on your page you can use a feature called “Highlight”. Hover your mouse over the top right hand corner of your post and click the star icon. *If you don’t want this particular status highlighted, simply click on the star again to undo.
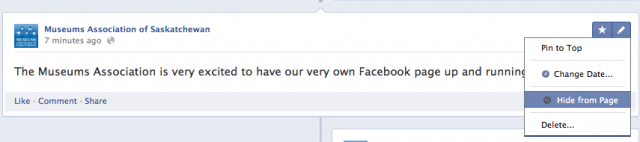
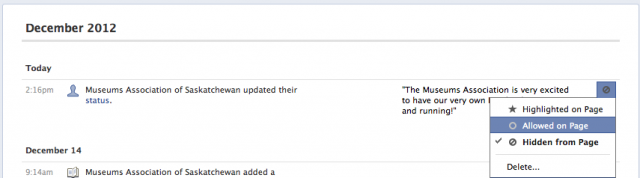
Hide – Sometimes when you are making numerous additions to your page, you don’t necessarily want them to appear on your Timeline for everyone to see. The solution for this is to hover over the right hand corner of the post again and click on the pencil. Then choose “Hide from Page” from the menu.
Undo Hide – If you decide right away you don’t want your status hidden, simply click the button “Undo” that should display after you have hidden your status.
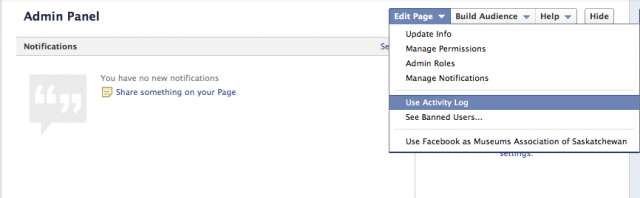
If you decide later on that you would like the post to display on the Timeline again, go to the Admin Panel. Click on “Edit Page”, and then click on “Use Activity Log”.
You should now be able to see your hidden status. Click on the hidden symbol in the top right hand corner of the status and click “Allowed on Page”. Your status will now be visible again on your Timeline.
Delete – To delete your status, hover over the right hand corner of the post again and click on the pencil. Then choose “Delete”. *Keep in mind that deleting a post cannot be reversed.
Milestones – Another Facebook feature is the ability to add Milestones. Some examples for milestones for your museum could be: • When your museum opened • When your museum moved from one location to another • When your museum received an award • When your museum established an important partnership • When an important event happened at your museum
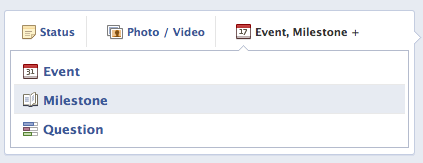
To add a milestone go to the top of your page, where you would normally type in a status and click on “Event, Milestone, +”, then choose “Milestone” from the list.
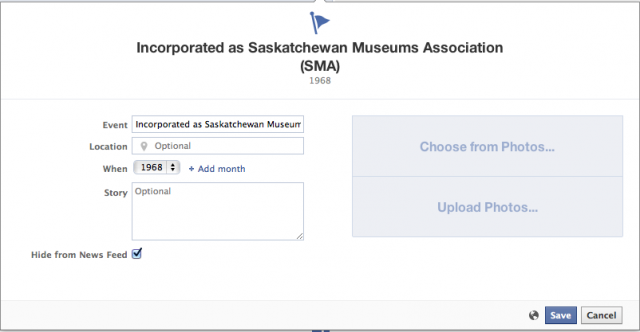
Then fill out information in the boxes shown. Here you can choose the location where the milestone took place, a specific date (month and year), provide a story (description), as well as upload a photo. Click “Save” when you are satisfied.
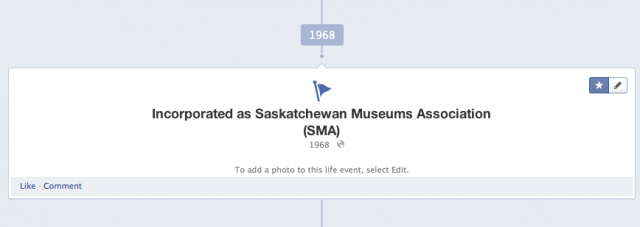
You should now see your milestone on your page!
That’s all for today! Remember that Facebook will get easier to use as you get more comfortable so don’t be afraid to play around with it. Stay tuned for the next tutorial on how to add more content such as links, photos and videos to your page!
The Museums Association of Saskatchewan presented the Moose Jaw Museum & Art Gallery and Sadi-Rose Vaxvick with the Excellence in Saskatchewan Museum Award of Merit at the 2026 Lieutenant Governor’s
June 19, 2026 WESTERN DEVELOPMENT MUSEUM – NORTH BATTLEFORD is now accepting applications for the following position: Grounds Assistant (term) GENERAL DESCRIPTION: Reporting to the Facility & Maintenance Supervisor, the
June 19, 2026 WESTERN DEVELOPMENT MUSEUM – NORTH BATTLEFORD is now accepting applications for the following position Customer Service Assistant (term) GENERAL DESCRIPTION: Reporting to the Manager, the Customer Service